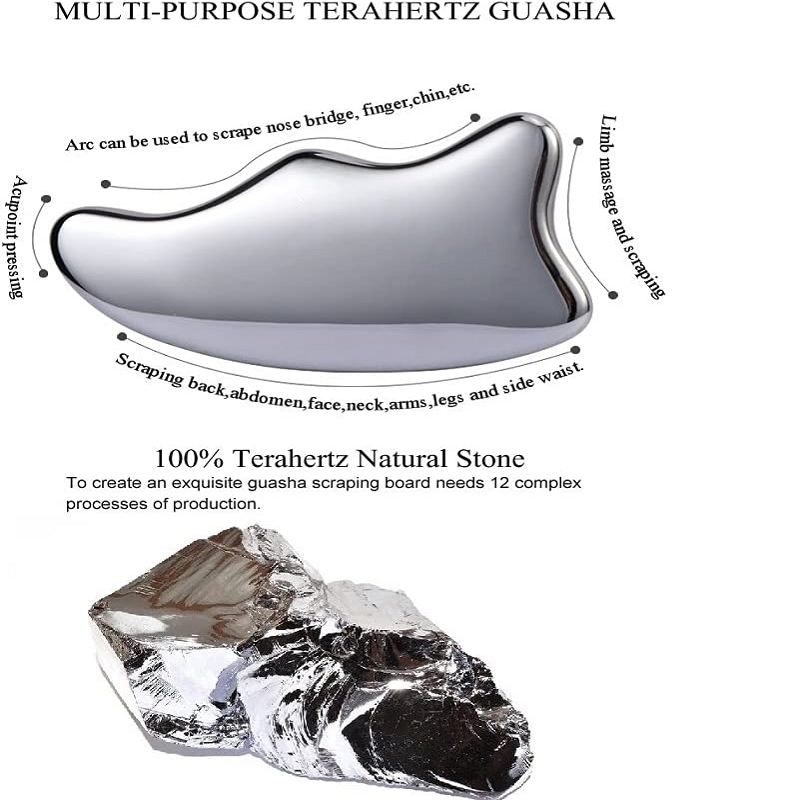
How to Use Guasha
Integrating a gua sha tool into your weekly skincare routine, ideally around three times, can be a profoundly beneficial practice for enhancing your complexion’s natural radiance and promoting a sense of overall wellness. This ancient technique, when performed correctly and consistently, goes beyond a simple massage; it is a ritual of mindful self-care that addresses circulation, muscle tension, and the natural contours of the face. To truly reap its rewards and ensure the safety of your skin, understanding the proper preparation and technique is essential.
The single most important step, the non-negotiable foundation of the entire practice, is preparation. The gua sha tool must never be dragged across dry skin. This can lead to pulling, irritation, and broken capillaries. Instead, the process must always begin with the application of a generous amount of a slip-enhancing product. This is typically a fluid serum or a rich, emollient cream or facial oil. The purpose of this product is twofold: it allows the tool to glide effortlessly over the skin’s surface without any friction, and it simultaneously delivers a concentrated dose of nourishing ingredients, ensuring that the massage is both effective and hydrating. A well-lubricated complexion is the perfect canvas for the gua sha, turning the ritual into a smooth, relaxing, and beneficial experience.
Once your skin is thoroughly prepared, the actual massage can begin. The guiding principle for every movement is directionality: you always want to work from the center of the face outward, and upward. This specific direction supports the natural flow of lymphatic fluid towards the lymph nodes located primarily in the neck and behind the ears, aiding in drainage and reducing the appearance of puffiness. Start with gentle but firm strokes on the neck, pulling the tool upwards from the collarbone towards the jawline. On the face, begin at the chin and pull the tool along the jawline up towards the earlobe. On the cheeks, start near the nose and pull outwards and upwards towards the hairline. For the forehead, begin between the brows and sweep upwards and out towards the temples. Each stroke should be slow, intentional, and repeated 3-5 times per area. The pressure should be firm enough that you feel a pleasant release of tension but never so hard that it causes pain or redness that lasts more than a few moments.
This is where the unique shape of the gua sha tool comes into play. The different curves and grooves are designed to hug the specific contours of your face for targeted application. The smaller, concave grooves are perfect for precision work on delicate or narrow areas. For instance, you can use this smaller curve to gently sculpt the brow bone, gliding it along the arch to relieve tension. The same small groove is ideal for smoothing the lines on the bridge of the nose or the space between the eyebrows. Furthermore, it fits perfectly along the ridge of the jawline, allowing you to meticulously define and release tightness in that strong, angular area of the face. Conversely, the tool’s larger, broader edge is designed for larger surface areas where you can use broader, sweeping motions. This part is excellent for smoothing the expansive planes of the cheeks and the forehead, promoting circulation and a lifted appearance across these wider spaces. By thoughtfully switching between the tool’s edges, you engage in a comprehensive massage that addresses every curve and plane of your face, making your three-times-weekly practice a holistic and deeply effective ritual for sustainable skin health.
This regular practice, combined with proper technique, can become a cornerstone of a holistic approach to beauty, one that values both visible results and mindful relaxation.
The Surprising Benefits of Terahertz Gua Sha Massage
Let's Chat About Terahertz Massage & How to Use It
Related Article